An environmental portrait can tell a story about a person, what they do how they live their passions but some times it is not always possible to get get your subject in a good visual environment. It can cost a great deal of money to arrange a photoshoot in an existing location having to get permits, assistants, hair and makeup all the details for a successful portrait. Building a set is another option but this too can run into astronomical costs. If the budget for a photograph is limited but the client still needs to obtain something different than a quick portrait, composting tools in Photoshop can save the day. Locations are very easy to photograph on their own without the subject actually being there, so a much lower cost is incurred to get half the final image. So how do you get from a standard photograph of a person at one location and bring that photograph into a completely different background. Below is a portrait of Dancer Michael Cameron of Cirque Du Soleil shot in his Kitchener, Ontario basement, this will be the first element of the final photograph.

Dancer Michael Cameron ©2017 peter tym
After the photo of Michael has been imported into photoshop the background will be removed using the quick selection tool. Now all the techniques used in this post take some time and practise to achieve so I will only be describing the steps not the technique.

Dancer Michael Cameron ©2017 peter tym
The screen shot above shows Michael with the background removed and the images is a layered image with a transparent background. This is still a raw image and this layer will need to be flopped or reversed to match the final positioning. The levels and colour balance will also have to be adjusted to match the final image.
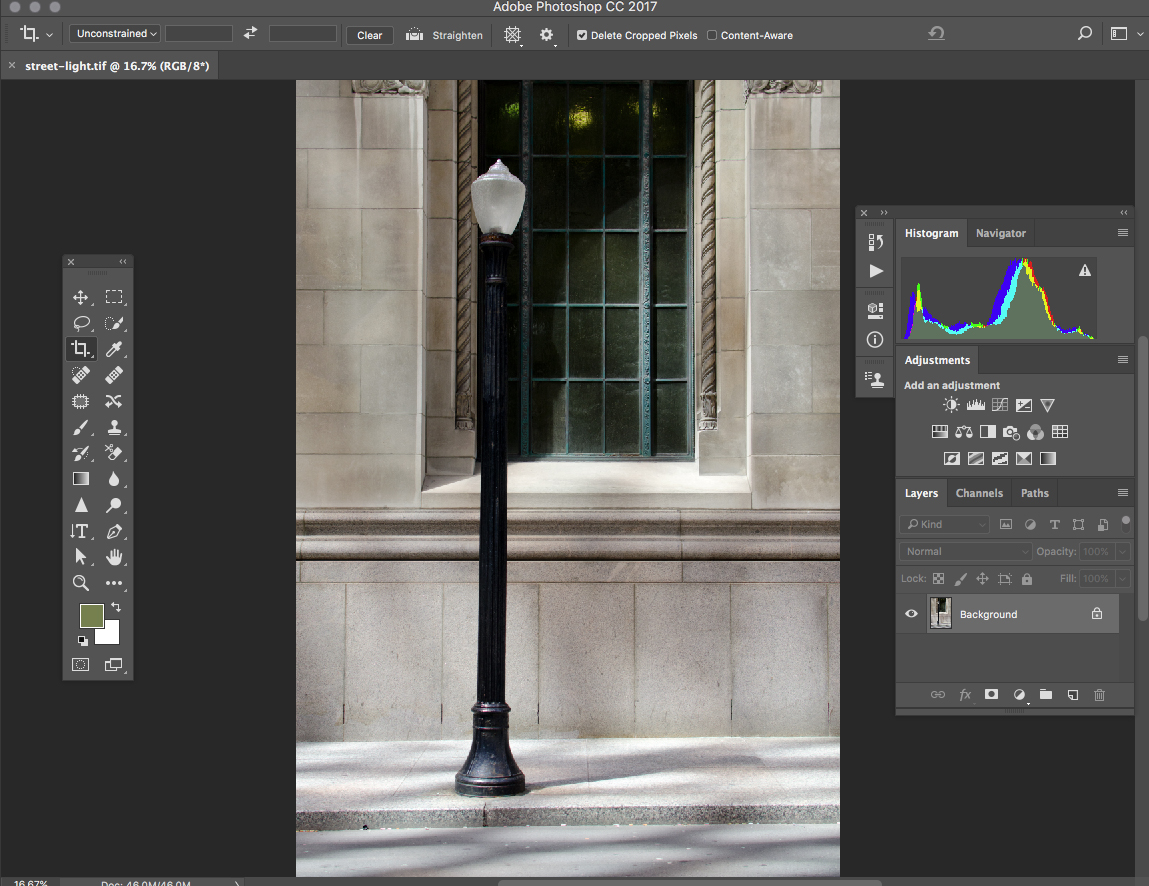
Original Street Scene ©2017 peter tym
Next step is to import the street scene background into Photoshop. This photograph was taken in the financial district of Toronto at around 11:00 am. I often photograph subjects in this area because the light being reflected from from the surrounding buildings can be stunning at most times of the day, so great backgrounds are to be had and just walking around with a camera can yield a good catalogue for future use. This photograph of the lamp post is good enough on it's own but I need an evening street scene with the lamp light on and the whole scene appearing as if it were getting on to night. This is done quite easily by making a light circle in the street light bulb area making a mask of the lightened bulb and then lowering the light values around the bulb to make the scene appear that it was shot later in the day. Colour balance is also adjusted to the warm side as it would be in the evening.

Corrected Street Scene ©2017 peter tym
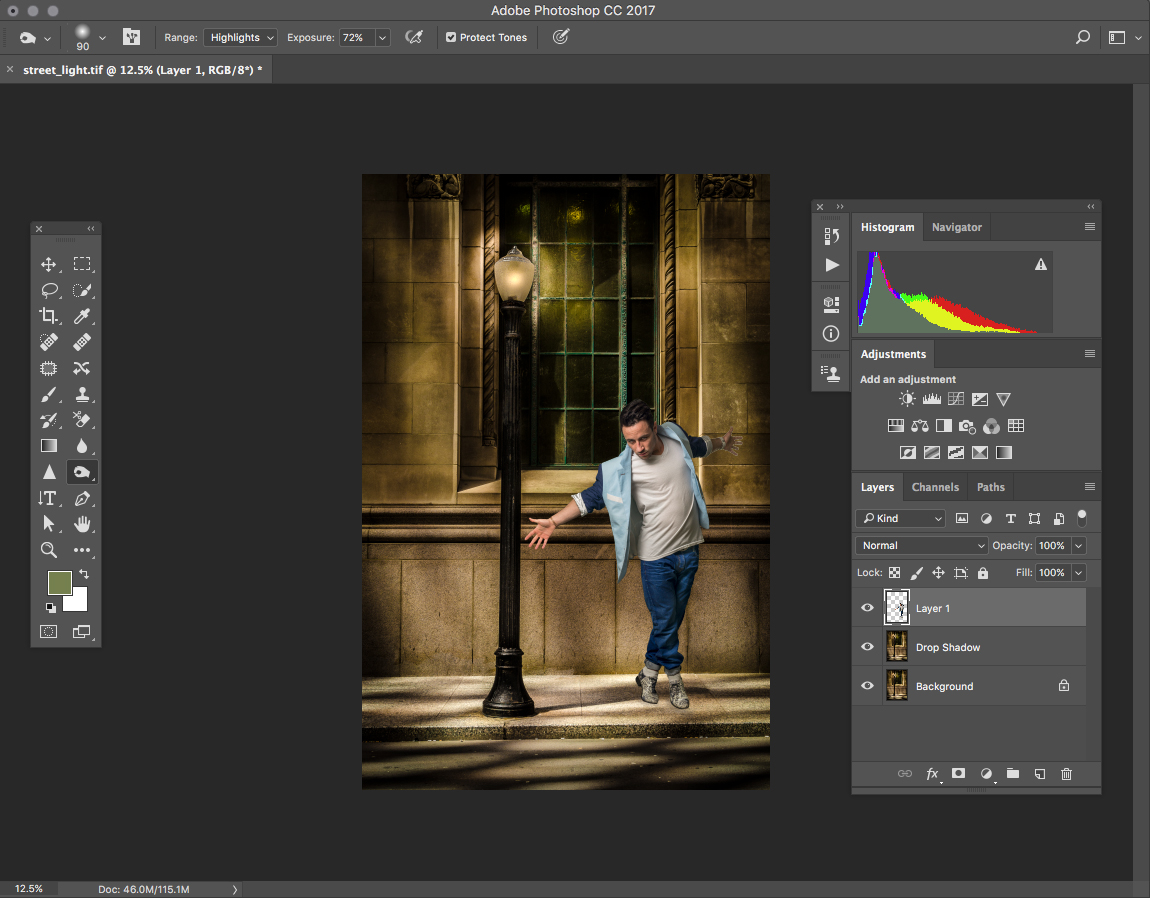
The screen shot above shows the final corrected scene with the street light on and a warm evening glow to the whole scene. This is the second element to the final environmental portrait. If we now open the lamp post image and the file of Michael on a transparent background together in Photoshop, using the move tool we can now drag the Michael Layer on top of the background layer. Use the move tool to position Michael in the scene and the free transform tool to size the Michael layer to fit into the composition. Couldn't be easier.

Layered image files ©2017 peter tym
Here we have the two images ready to be moved over each other using the move tool, and when we do it will give us a file that looks like the image below.
Dancer Michael Cameron ©2017 peter tym
Everything looks to be in order with this image except Michael seems to be floating a couple of inches off the sidewalk. Now Michael is a terrific dancer and could probably make this move easily but in a photographic sense it's a little disturbing to have no shadow under his shoes.
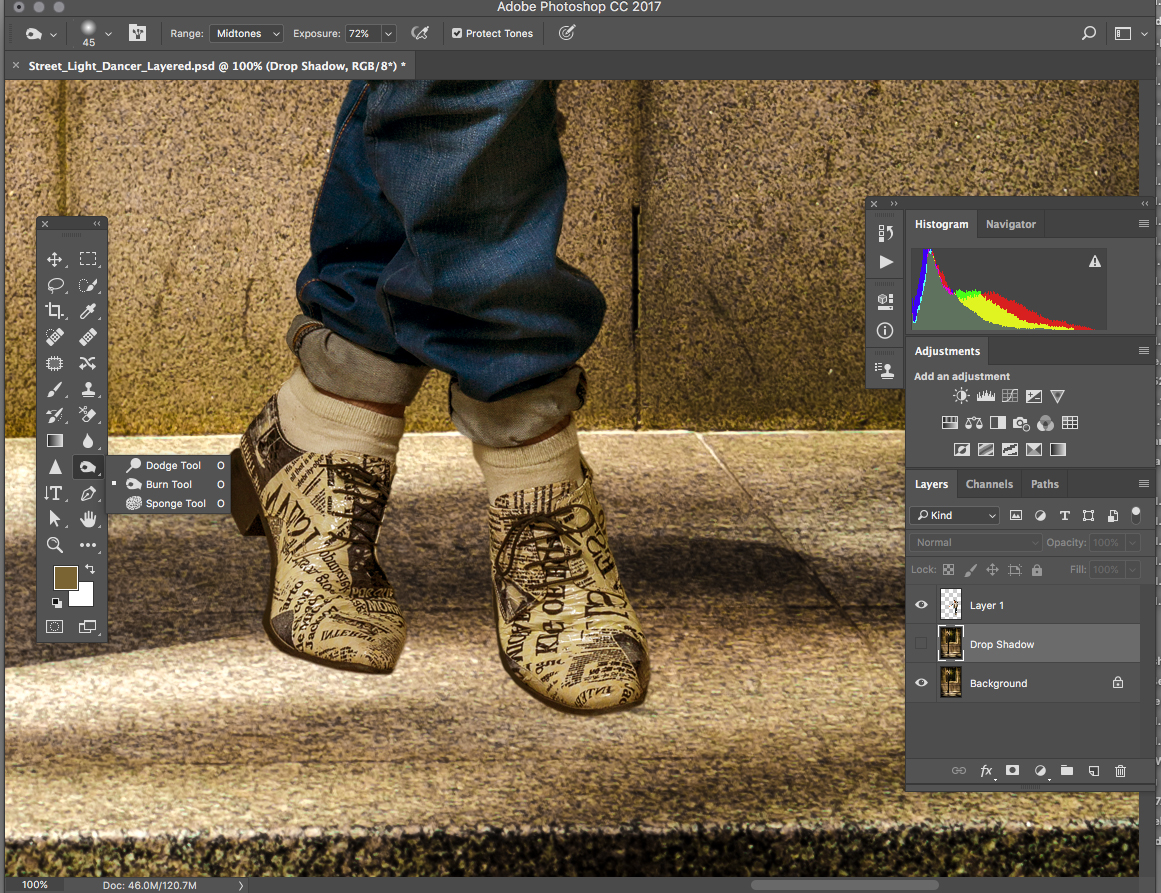
Close up of Michael Cameron's feet ©2017 peter tym
As you can see in this close up of Michaels shoes, it is quite disturbing visually and that's because there would be a shadow under his shoes. As indicated by the screen shot you can see the layer's panel on the right side, the layers consist of a background layer and a duplicate of the background layer named drop shadow and above that the transparent layer of Michael. To produce the drop shadow select the drop shadow layer and choose the burn tool from the tool pallet. Use the burn tool to "burn in" the shadow using the highlight, mid tone and shadow settings to create the drop shadow.
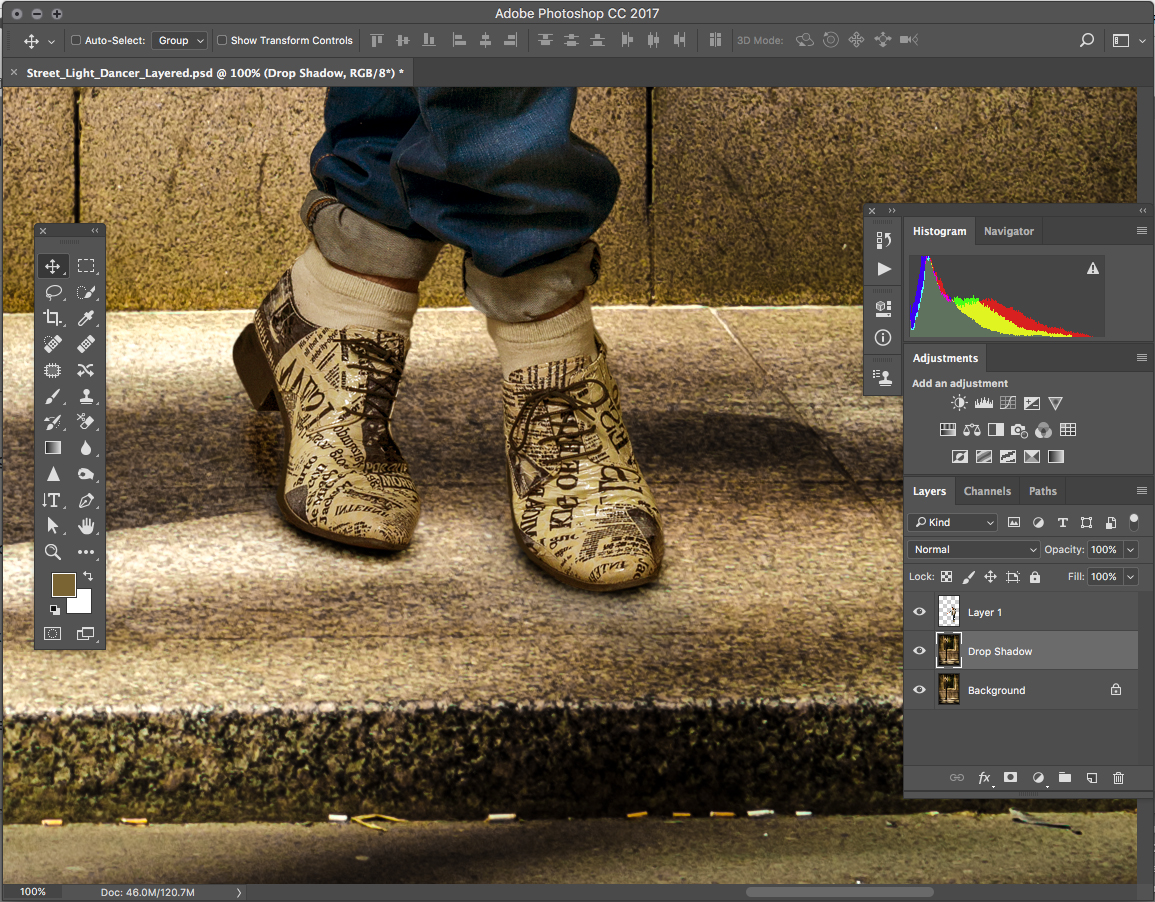
close up with drop shadow ©2017 peter tym
As can be seen in the above screen shot that Michaels feet are anchored to the ground because of the drop shadow which looks more natural than hovering over the side walk. Now with the three layers still in place final adjustments too the image can be made. Next merge your layers to flatten the image and save as your final image. This image took the travelling time and shoot time to photograph Michael at his location and because of my catalogue of stock back ground images I was able to pull the two images together in Photoshop in under an hour. Far cheaper than doing it all at once. This technique isn't always the best solution but it is certainly a good option to have in your bag of tricks. So this how I went from here,

Original Image ©2017 peter tym
To the final image below as presented to the client.

Michael Cameron Final Image ©2017 peter tym